415-595-5348


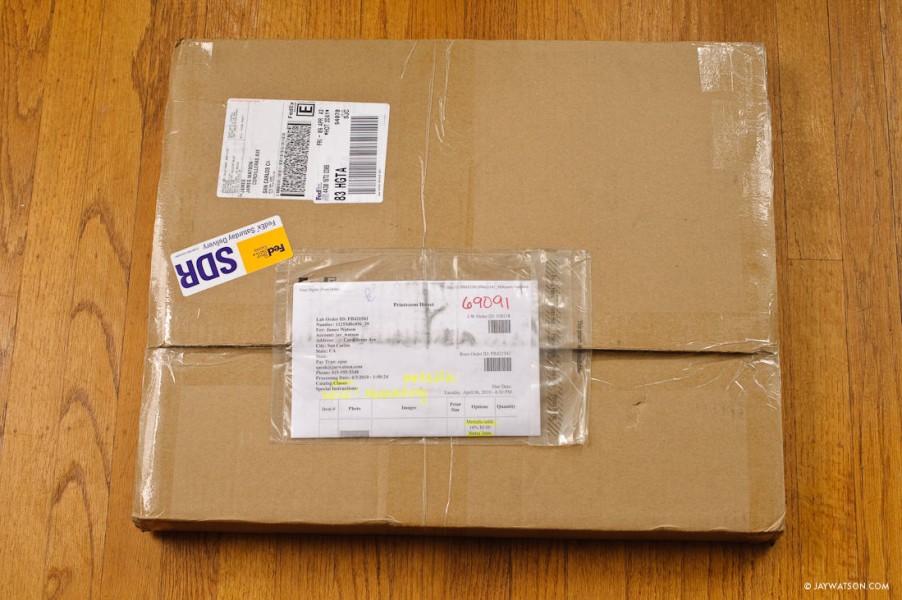
One of the most rewarding experiences in photography comes from receiving a print order. Here are some recent gems that came in this week that were mounted on sintra and gatorboard. Go to the bottom to learn how to hang photos without a frame and without looking like a complete cheapskate by mounting your work.
click to enlarge

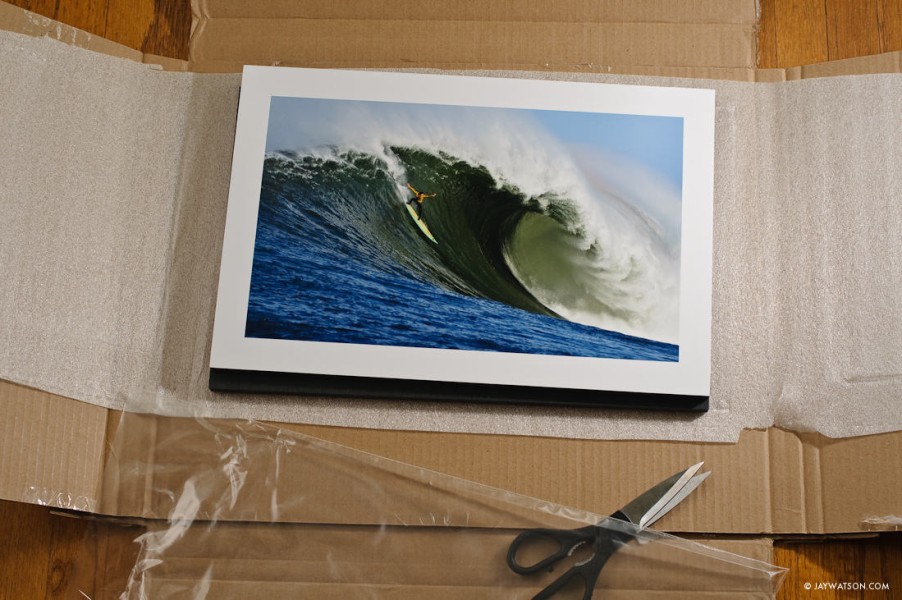
10″ X 15″ of Peter Mel is heading to Maine, mounted on 3mm sintra. 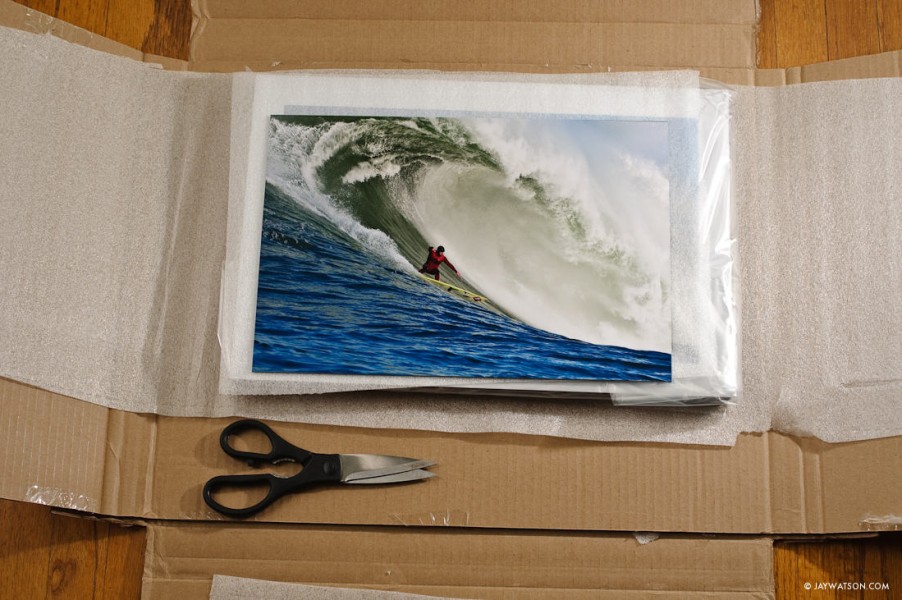
Prints for Habilitat in Oahu
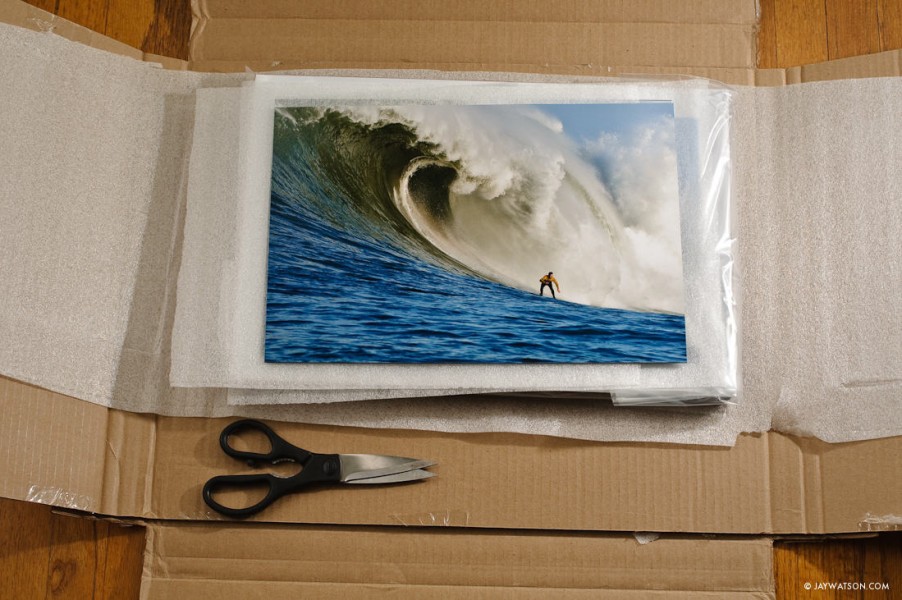
Two 12″ X 18″ prints are being sent to Kaneohe, Hawaii for the 10th Annual Habilitat Luau & Art Benefit. Each year I donate work to Habilitat which is a long term residential drug addiction treatment center on the island of Oahu. This year I asked one of the residents of the program to select an image from my website to be included in the benefit. He excitedly chose this image below of Zach Wormhoudt charging down the face of a wave at Mavericks in Half Moon Bay, CA. This year’s luau will be on May 22nd at Windward Community College.
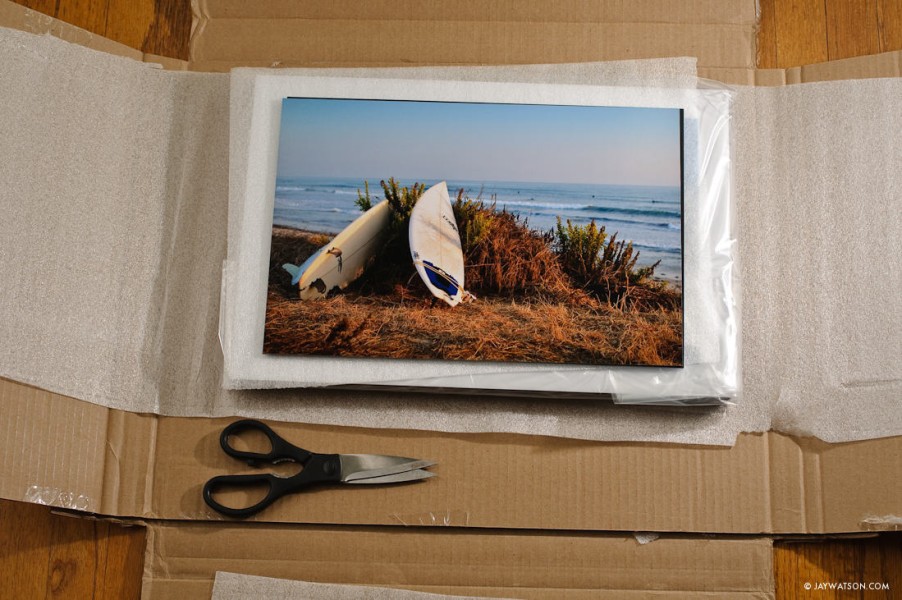
Habilitat Art Auction in Oahu also gets a 12″ X 18″ print of Capitola, CA, mounted on 1/2″ gatorboard.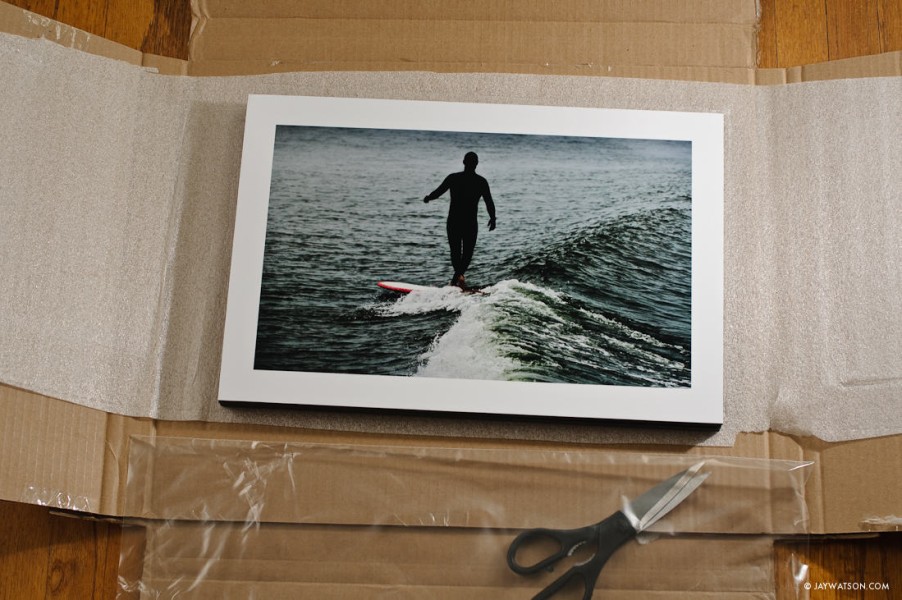
Frameless Presentation
A traditional way to hang photography is to mount the prints to a hinged 8-ply window mat board under UV glass with a custom frame. This offers the best protection but it is exceptionally expensive. I have been getting photos dry mounted to Sintra (a 3mm thick durable lightweight PVC material) and gatorboard (similar to foam core but much stronger due to the wood pulp fibers). Dry mounting allows artwork to lay completely flat when framed under glass and is almost always required for pieces 11X14 and larger. Once mounted, you can also hang your work without a frame without using clothespins, binder clips, or thumb tacks. Your work does not deserve such injustice.
This 10″ X 15″ of Mavericks printed on metallic paper stays here, mounted on 3mm sintra and “floated” off the wall.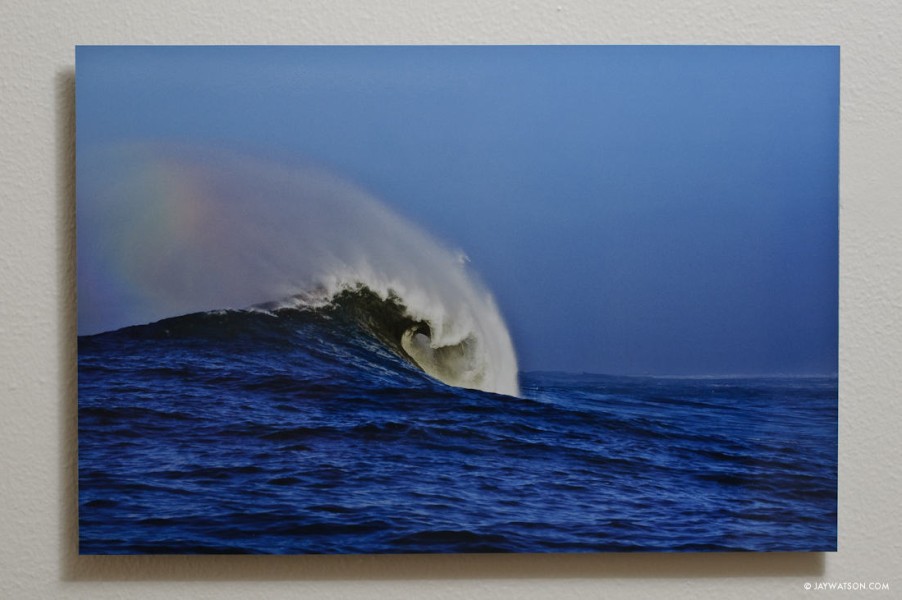
• • • • •
How To Go Frameless:
If done correctly frameless photography can look as nice as a framed piece and offer similar protection. You need to do (4) things.
1) Dry mount the photo to a substrate that will not flex. Materials can include: artboard, masonite, metal, plexiglass, and gatorboard, Foam core will not work and will warp over time. There is also a law of physics that states as soon as you mount a photo to foam core you will drop the photo and dent the corners. Don’t do it!
2) Have the artwork UV coated. This also protects the print from moisture, dust, and the color will not self destruct under normal viewing conditions. UV coatings can be either: clear, luster, gloss, or high gloss. These are extremely thin protective sheets that are completely invisible. Friends don’t let other friends emboss textured coatings like linen or canvas onto their photos. Keep it classy and go clear.
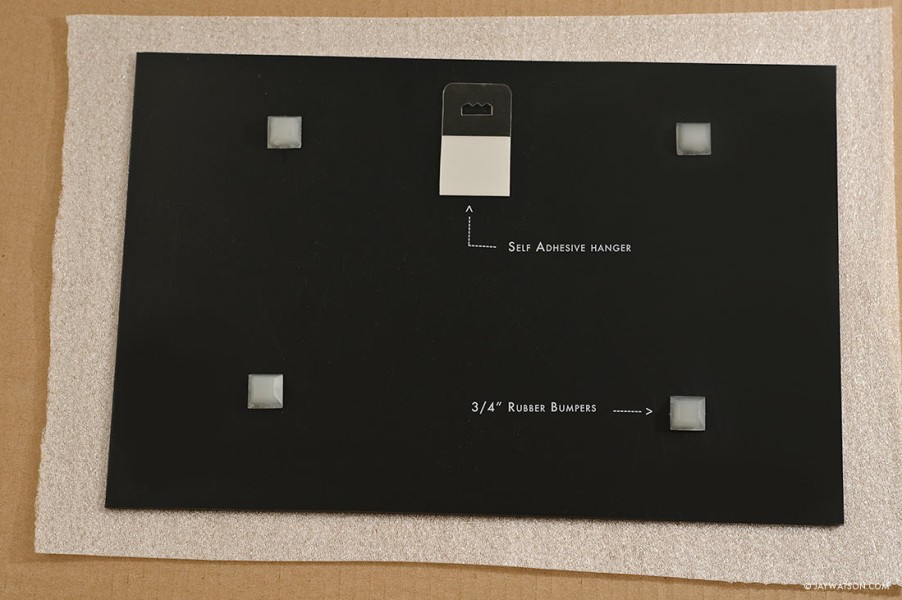
3) Place a self-adhesive hanger on the back of the mounting material. These are very strong due to the large surface area, but for larger pieces go with (2) adhesive hangers and a piece of wire.
4) “Float” the mounting material away from the wall. Many framers and labs mount a smaller piece of 1/2 gatorboard behind the dry mounted photo. The easiest solution is to use thick self-adhesive rubber bumpers found on Amazon and Home Depot. Place one at each corner of the print about 4 inches toward the center to hide their appearance.
Additional info and resources:
Unless you don’t mind doing the whole thing over again in a few years because the color has shifted, don’t skip the UV coating in order to save a few dollars. Most labs and some framers can do this for you. The biggest concern for archival properties is from the heat and adhesives used in the dry mounting process. Shop around and ask questions, or do it yourself. To save a few steps take a look at the self-adhesive gatorboards and other materials at www.artsupply.com. Gatorboard is very rigid and will have to be cut by saw. You can do it yourself or job it out to save a few steps.
Here are two recommended and inexpensive online printing labs that offer color controlled printing (ICC profiles), dry mounting, and UV coating:
Get your work outside of the computer and make some prints! Then hang em!
• • • • •
RELATED POST:
Photo On Aluminum: BumbleJax A Photo Printing + Mounting Service


You’re always impressing me, Jay! I really like what you said here, because I’ve heard you talk about it before when we’re at art shows: “It also allows you to experiment with frameless presentations that does not include clothespins, binder clips, or thumbtacks. Your work does not deserve such injustice.”
Also, I’m so glad we get to keep that little rainbow wave piece. I love it.
excelent!!!
love it. Amen brother to the non-linen/fake canvas texture and denting the corners on foam core mounted pieces (my prints were dinged big time AND pulled away from the foamcore mount!) really like the home desperate bumpers idea. the images you show rock.
Really useful post, the prints look great, thanks Jay!
Hey Jay, nice post and couldn’t agree more. In my opinion anything that takes away from the image itself which I think traditional framing often does, diminishes the power of it and floating it adds another dimension. At BumbleJax.com we use gatorfoam as well as plexi, aluminum and even bamboo. We’d love to discuss donating a piece for the charity you discuss above. Feel free to contact us anytime.
Thank you so much! 🙂
Any thoughts on how to hang a giant poster (6ft x 4ft) mounted on sintra?
@JK – Yes. Super easy. Lay the piece face down. Use gorilla glue or liquid nails to adhere two long pieces of 1X2 wood to the back. Imagine replacing the rubber bumpers shown in this post with long pieces of 1X2. Run a wire between the 1X2 for hanging. If you still get too much flex (sintra is very flexible) then run cross pieces at the bottom and at the top for extra support. Good luck!
Am going to be in my 2 art corridor showing this year. coming up on the 2nd. last year i had an extreamly limited budget and wasnt able to afford any prints bigger then an 8×10 and some cheap frams. i did it mself. this year i was able to save a little money ahead and had my pictures mounted ( i believe on gatorboard) ., But they have to be ready to hang and i was completly unsure on what to do. i googled it and this blog was the first to pop up.. I wanted to thank you so much. it has been a great help!!!!! feel free to email me.
Thanks Katie! Glad this idea helped. It can definitely save on some costs for putting a show together on a budget. Just make sure you get those prints protected with a clear coat since they won’t be under glass.
Which lab do you use for these? Thank you!
@Jacqueline
I use a variety of labs. Some of my favorites are:
Oscar’s Photo lab – San Francisco
Printroom, White House Custom Color – both are a great value
Bumblejax – great mounting options
West Coast Imaging – custom printing and inkjets
Hi Jay – any ideas on how to fix photos i already have mounted on foam board? Exactly as you said, one of my pieces got dinged after being dropped. i chanced upon your blog after searching for fixes. Can i remount?
Foam core is not very forgiving. Without seeing it, my guess is that remounting the photo would destroy it. For a minor ding you might be able to smooth it out to minimize the blemish, but if it’s beyond repair you might have to trim it short. The fight frame might cover it up. Good luck.
Hi Jay,
Your suggestions give me hope. Photos of assorted sizes have been mounted on 2mm styrene for a gallery exhibit and look great w/o frames. I want to display them this way. However, I have been told by the photo lab and a framing store that adhesives will not stick to the nonporous styrene. Your experience seems to be different. Would adhesive strip hooks like Command stick to the styrene? I just need something on the back to connect to a gallery hanging system. I certainly don’t want the pieces to be falling off, but really want to present them w/o frames. I can not put anything on the wall itself. Much appreciation for your input!
Jane
I think the adhesive hook would work for smaller size pieces where humidity isn’t a factor. Styrene is light and the adhesive hook has a sponge tape on the back which works well even on smooth surfaces. You can even used two adhesive hooks (spaced several inches apart and connected by a wire) to give extra strength. The lab is right that most adhesives will not stick. Epoxy might work but it could eat through the surface causing new problems. Since you already mounted the work to styrene – just try the adhesive hooks. If it holds well at home for a few days then you can feel safer taking it to the gallery.
Many thanks for your suggestions. Off to buy some hooks to set up the test pieces. The heaviest is 13 ounces. If I end up using this method, I will let you know the outcome after the month’s showing.
I appreciate very much you sharing your time and knowledge.
Jane
@Jane
Awesome. Thanks for the shout back. I hope the info helps and I wish you luck!
Hi Jay. Great piece. Thank you.
I got a sample piece of 3mm sintra from a local sign company and brought it to my local frame shop to inquire about dry mounting. He uses a high-heat dry mounter and I read somewhere that sintra is formable or at certain temperatures. Would this be a problem? He had never dry mounted on sintra before and seemed a little concerned. He’s used to gatorboard, but I’d like to try sintra for the more attractive edge (and thinness).
I also noticed how flexible sintra is. Do the four “bumpers” aid in helping the piece lay flat without hanging or mounting induced curvatures? Or does it naturally hang flat? The largest piece I’ll be mounting will be about 24″ x 32″. Would you recommend any additional supports on the back? And, would you recommend more than one hanger?
A lot of questions…. Thanks for you help!
@Chaz
Hey thanks for the visit. The high heat dry mounter should not be a problem for the sintra since the heat won’t be applied over an extended period of time. Of course – a test is always the safest bet. Yes sintra is very flexible. Normally I would not recommend float mounting it off the wall with bumpers for any piece that is 12×18 or larger. The bumpers won’t give make it more rigid or help it to lay more flat. So if you need to add rigidity, add a piece of gatorboard to the back of the sintra that is cut smaller than your piece (example 20″x28″ gator mounted behind the 24″x32″ piece).
At 24″x32″ your piece is fairly large so you may want to consider a different substrate like metal or plexi for float mounting. Metal is great for this and it has less problems than plexi. It’s super thin, and flat.
All of these materials have different characteristics. They should be tested to see how your work will look and how the material will react to the glues/heat/pressure. It’s all part of the process so try to enjoy it as you learn what works best for you.
Hi Jay,
Thanks for this post! I am doing a gallery showing for photo contest winners. I am on a budget, so I have the printing on presentation paper donated, and then I’m mounting on eco board, which is kind of like corrugated paper foam core. I have to use this product because the gallery is very eco and requires it.
Anyway, do you have any advice for hanging this type of mounted photo? Is the self adhesive tab still an option for large images, up to 32 x 48? Or should I try glue guns or something else? Any help is deeply appreciated.
@Kim
Congratulations on the show! The biggest concern for mounting at that size without frames is warping with corrugated paper foam core. If you use frames it will help prevent warping and keep the artwork flat.
If you are not concerned w/ archival properties and only need to hang for the show then try the eco board. For a frame less hang cut a second piece close to 22×28 to stand out from the wall. Mount it to your 32×48 piece with super wide double sided adhesive tape (not spongy style tape) or large pieces of double sided adhesive sheets for extra strength.
For hanging, mount 2-3 adhesive tabs to the stand out piece and string them together with framing wire. This will give more strength to hold the weight than just hanging one tab onto a nail.
Good luck!
I have several gallery style frames which have very hard backs and a layer of glass. The photo is put between the two and held together with metal snaps. How do I hang them? Would the self adhesive hangers work? One print is 20×28 and the other a bit smaller.
@Debbie – sounds like a normal frame. If so why not attach to D-rings to the back of the frame (or small round eye hooks) and sting a wire between them? Adhesive mount is not strong enough for that size and especially with glass. Good luck.
I have a 48″x32″ print mounted on 1/2″ gatorboard. Tried putting it up using strong magnets (glued to the back of the gatorboard) but no luck. Would the self adhesive anchors work for this size? Your help is much appreciated.
If magnets didn’t work then self adhesive mounts wouldn’t hold either due to the size, weight, and thickness. Try mounting (2) 1×2 wood strips to the back with a strong adhesive glue, sting a wire between the wood using D-rings (or eye hooks). Hang and celebrate.
Jay, great article. I’ve read it a couple of times over the years. For the 12×18 prints that look like they have a white mat around them, do you print them with a large white border or are they mounted on a larger piece of gatorboard to provide that matted look? I’m trying to figure out a good way to create mounted prints that are also matted (or “matted”) to include in a bin art area for a show I’m about to do.
Hi Zach
Nice landscape work on your website! Yes I print with a white border. It might work well for your art bin and save you a few dollars on the matting. You could drop them in a poly bag and add a backing board. Have a great show.
Thanks Jay! Turns out the gallery wants it a specific way so I’m doing it their way. But I do like your way better, so I’ll probably set things up and get a bunch printed with a border on gatorboard for quick sales.
Jay
I am mounting an exhibition of 25 prints and I can print them at either 16X 24 or 20X30. I am getting them mounted to Sintra and I was wondering if the 1/2 inch gatorfoam would work as a floater? For example, I would mount a 16X26 inch piece of gatorfoam on the back of the 20X30 inch sintra. From there, would the self adhesive hangers work or would I need to glue on D rings with JD epoxy?
Thanks for any suggestions!
@Dena
Congratulations on the show. Yes the 1/2 gator board would work to float the image away from the wall. I would only use the adhesive hangers for small prints (up to 15″ longest side). You could use (2) adhesive hangers (for more strength) with a wire string between them. This should be fine for 16×24, but still risky for 20×30 due to weight.
There is another issue – for larger sizes, you may want the piece to float more away from the wall. So I would suggest cutting (2) 1″x2″ pieces of wood roughly 6 inches shorter than the height of your piece. Glue them to the back of the sintra (get a glue that is safe for plastic) and string a wire with D-rings between the wood. This would be my personal choice for both your 16×24 and 20X30 sizes. I bet it will look great!
Thank you so very much! Will the 3mm Sintra be strong enough for this method? I am shipping the work, so will this make shipping more difficult? I thought that maybe I could pack them face to face and back to back? Thanks for your input!
Dena
@Dena
Yes. Sintra is strong enough to hold the wood. You’ll see the sintra flex at your larger size but it won’t be an issue when it’s hanging on the wall. The wood will take up space when shipping. Protect your corners and surfaces. Good luck!
[…] first attempt on a test photo was using the technique described by Jay Watson at How To Hang Mounted Photos. His supplies were actually quite expensive per-photo and the bumpers did not push the photo far […]
Hey, I used your blog as inspiration for my photo wall, but also tweaked a few things on the mounting process. Thanks for getting me started!
http://www.destination-adventure.com/2016/02/diy-photo-wall/
Hi Jay, can you give pros/cons on sintra/styrene/gatorfoam?
I am preparing 16 12 by 18 b&w prints as part of an installation for an exhibition.
Thanks!
Andy
@Andy
It should be noted that all of these options are not archival since they involve adhesives to mount the photos to a substrate and the print surface is exposed (if float mounting). Some argue that true conservation would not rely on glues, everything should be acid free with strong archival ratings, and the print should be protected (UV glass). For general purposes we want things to last a decent amount of time. Cheap materials can show the side affects from off gassing and bending in as little as 1 year under certain conditions. Make the right choices and get a UV coating on the prints and your float mounts can easily look good for several years. Here are some pros and cons for mounting materials:
Sintra:
+ thin substrate (3mm) so it can also be used in a frame
+ durable, clean edges, light weight, good for float mounting
+ acid free, minimal off gassing
– noticeable bends at larger sizes
Styrene
+ less expensive version of sintra
– very thin (1mm-3mm) so it will flex with medium to larger sizes depending on thickness
– often used as a cheap alternative to plexiglass in frames, and known as “plastic glass” that scratches easily.
gatoboard
+ great for float mounting – lightweight, rigid, durable
+ doesn’t warp!
+ has wood fibers. less plastic and off gassing than other substrates
– more expensive
– thicker stock choices are hard to also use in a frame
– difficult to cut
styrofoam
+ acid free version is good for backing inside a frame due to lightweight
+ inexpensive
– horrible for float mounting – edges and corners easily damaged, easily warps
– easily warps! does not lay flat!
Hope this helps! – JW
Hi Jay, Just came across your site. This is extremely helpful. Thank you! I am mounting a show of over 30 13 x 19 black and white prints on gatorboard, with wooden strips on the back as you suggest. You mention some kind of UV sheets to protect the photographs. Can you refer me to a specific product? Not sure exactly what I am looking for and how to attach it to the photos.
Many thanks,
Nick
@Nick
The UV coating is a thin sheet that is applied over the photo during the laminating / dry mounting process. I don’t know of any worthwhile DIY methods for applying a UV coating other than UV spray for matte surface ink-jet papers. For anything else, have it done by the lab when they do your dry mounting.
This is a very useful post. I have been looking for information on glue and mounting hardware for gatorboard. Most will say that the push pin mounts won’t hold, but it’s difficult finding d detailed info about hanging.. I like the wire idea for 16×20 but hope the self adhesive version will work for 11×14. It seems bumble Jax using a push pin mount with tape.
Thanks for this! I scoured the Internet for how to hang matted art and finally found your article.
Excellent advice Jay!
As for the UV protection – do you use spray or roll-on?
What brand?
I print myself, on an Epson inkjet surecolor P800, on luster paper with Epson’s water based ink.
I’ve looked into both Hannemühle, PremierArt and Moab Desert, all sprays.
Any suggestions?
Thank you!
Hi Claus – For UV protection with matte surface inkjet papers the spray versions work great! I’ve had good results with the reliable brands like Hahnemuehle and Moab. Premier Art looks good but I’ve never tried it, and I’ve also never tried any sprays on semi gloss or gloss papers. If I was doing a frameless mount with those papers, I would ask the lab to apply the UV coating with their machines. Good luck.